Setting up Spinnaker authentication with Okta and SAML
08 Dec 2015 TweetAs of release 2.54.0, Gate has changed the way the SAML authentication mechanism is configured. Please follow the migration guide. If you stumbled on this guide looking for how to configure SAML follow the securing spinnaker guide instead
Recently Netflix in collaboration with Google, Amazon, Microsoft, and CloudFoundry have released a new OSS deployment application called Spinnaker (Asgard 2.0). Our team has been going through and setting up this tool to be production ready for our environments as we had been planning to move to a new deployment tool anyway. This post in particular will go into the details of setting up SAML authentication through Okta with Spinnaker. Although this is specific to Okta the concepts could be adapted to any other SAML Identity Provider.
At FullContact we use Okta to handle all of our Authentication which is backed by an LDAP provider called JumpCloud.
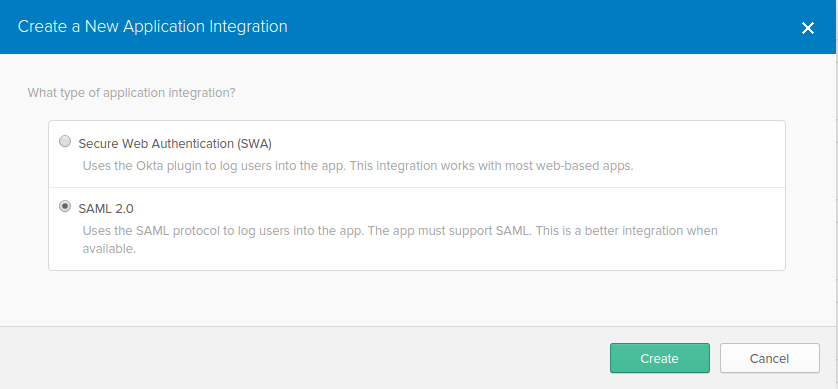
Setting up Okta
Step 1

Step 2

Step 3

Step 4

Setting up Spinnaker
We use the InstallSpinnaker.sh script provided by the Spinnaker team here https://github.com/spinnaker/spinnaker/blob/master/InstallSpinnaker.sh
Spinnaker itself is broken into several microservices. Looking at /opt you should see all the different service folders here.
$ ls /opt
clouddriver  echo  front50  gate  igor  orca  rosco  rush  spinnaker  stackdriver  userdata
Looking at the /opt/spinnaker/config directory we’ll find all the configurations from the different services. We can override any configuration value with an appname-local.yml file. The ones we are going to change are gate-local.yml and settings.js. When making changes to these files you’ll have to restart their respective service and/or regenerate their configuration file. service gate restart and /opt/spinnaker/bin/reconfigure_spinnaker.sh.
Gate configuration
gate-local.yml

saml:
  enabled: true
  requireAuthentication: true
  url: {okta_idp_url_for_application}
  certificate: {base64_encoded_certificate}
  issuerId: http://www.okta.com/{anyid}
  keyStore: spinnaker.jks
  keyStoreType: JKS
  keyStorePassword: {somepassword}
  keyStoreAliasName: okta
The above properties url and certificate will come from Okta after setting up the application. The certificate will have to base64 encoded first before placing it in the config directory.
The issuerId is a shared uri between both Okta and Spinnaker. You can pick anything for this as long as they share the same id
The keyStore is generated using the java keytool utility. Specifically this command:
keytool -importcert -file okta.cert -keystore spinnaker.jks -alias "okta"
where okta.cert is the previously described certificate not base64 encoded. It produces a file called spinnaker.jks and shares the alias with keyStoreAliasName in the gate-local.yml config. The keytool will prompt for a password which will be shared in the gate-local.yml config. The spinnaker.jks file should be placed with your local config or otherwise specified with a correct path in the config to it’s location.
Now restart gate service gate restart
Webapp configuration
settings.js

window.spinnakerSettings = {
  gateUrl: `${gateUrl}`,
  bakeryDetailUrl: `${bakeryBaseUrl}/api/v1/global/logs/?html=true`,
  pollSchedule: 30000,
  defaultTimeZone: 'America/Denver', // see http://momentjs.com/timezone/docs/#/data-utilities/
  providers: {
    gce: {
      defaults: {
        account: `${googlePrimaryAccount}`,
        region: `${googleDefaultRegion}`,
        zone: `${googleDefaultZone}`,
      },
      primaryAccounts: [`${googlePrimaryAccount}`],
      challengeDestructiveActions: [`${googlePrimaryAccount}`],
    },
    aws: {
      defaults: {
        account: `${awsPrimaryAccount}`,
        region: `${awsDefaultRegion}`
      },
      primaryAccounts: [`${awsPrimaryAccount}`],
      primaryRegions: ['eu-west-1', 'us-east-1', 'us-west-1', 'us-west-2'],
      challengeDestructiveActions: [`${awsPrimaryAccount}`],
      preferredZonesByAccount: {}
    }
  },
  whatsNew: {
    gistId: '32526cd608db3d811b38',
    fileName: 'news.md',
  },
  authEndpoint: 'https://YOUR_GATE_HOST/auth/info',
  authEnabled: true,
  feature: {
    pipelines: true,
    notifications: true,
    fastProperty: true,
    vpcMigrator: false,
    rebakeControlEnabled: true,
    netflixMode: false,
  },
};

window.spinnakerSettings.providers.aws.preferredZonesByAccount[`${awsPrimaryAccount}`] = {
  'us-east-1': ['us-east-1a', 'us-east-1b', 'us-east-1d', 'us-east-1e'],
  'us-west-1': ['us-west-1a', 'us-west-1b', 'us-west-1c'],
  'us-west-2': ['us-west-2a', 'us-west-2b', 'us-west-2c'],
  'eu-west-1': ['eu-west-1a', 'eu-west-1b', 'eu-west-1c'],
  'ap-northeast-1': ['ap-northeast-1a', 'ap-northeast-1b', 'ap-northeast-1c'],
  'ap-southeast-1': ['ap-southeast-1a', 'ap-southeast-1b'],
  'ap-southeast-2': ['ap-southeast-2a', 'ap-southeast-2b'],
  'sa-east-1': ['sa-east-1a', 'sa-east-1b']
};
This is actually the normal settings.js but we had to add a few extra configuration options which were:
authEndpointthis should behttps://YOUR_GATE_HOST/auth/info. Normally this is running on localhost:8084authEnabledshould be set totrue
Now run /opt/spinnaker/bin/reconfigure_spinnaker.sh for the settings to regenerate.
How this works
When hitting your spinnaker instance with authEnabled it will redirect to the earlier saml url configuration setting we provided to gate. Gate will create a signed message asking for access from Okta. Okta will ask them to sign into their account and redirect them back to spinnaker. Spinnaker validates the returned message signature using the certificate gate has access to.
One can access http://GATE_URL/auth/info to see your information after successfully authenticating. If you get a 403 forbidden it means you have not authenticated correctly.
Specific roles and access to accounts can be configured, but we currently have not set this up. Hopefully this is useful enough to at least get you started along the right path.
Thanks to my team mates, @charliesullivan and @alexbmeng, who did some code diving and contributed to setting this up for our environment